Making a fabric purse can be a fun and rewarding project! Here’s a basic guide to making a simple fabric purse:
Materials you’ll need:
- Fabric for the outer shell
- Fabric for the lining
- Interfacing (optional, for added structure)
- Sewing machine or needle and thread
- Scissors
- Pins
- Magnetic snap or zipper (for closure)
- Iron (for pressing seams)
Instructions:
- Prepare the fabric: Cut two rectangles from your outer fabric and two rectangles from your lining fabric. The size of the rectangles will determine the size of your purse; you can adjust the dimensions based on how big or small you want your purse to be. Remember to leave seam allowances (usually around 1/2 inch or 1 centimeter) when cutting your fabric.

- Optional: Apply interfacing: If you want your purse to have more structure, you can apply interfacing to the wrong side of your outer fabric rectangles. Follow the manufacturer’s instructions for fusing the interfacing to the fabric.

- Sew the lining: Place the two lining fabric rectangles together with the right sides facing each other. Sew along the bottom edge and the two side edges, leaving the top edge open. This will create a fabric pouch that will serve as the lining of your purse.
- Sew the outer shell: Repeat the same process with the two outer fabric rectangles, sewing along the bottom edge and the two side edges, but leave a small opening on one side for turning the purse right side out later.

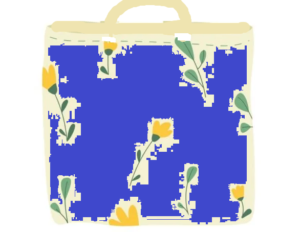
- Box the corners (optional): If you want your purse to have a more boxy shape, you can box the corners.(in the upper picture). To do this, flatten the bottom corners of both the lining and outer shell so that the side seam and bottom seam are aligned. Measure and mark a line perpendicular to the seam, then sew along this line. Trim the excess fabric and repeat for the other corner.
- Attach the lining to the outer shell: With the lining still inside out and the outer shell right side out, place the lining inside the outer shell so that the right sides are facing each other. Align the top edges and pin them together. Sew along the top edge, leaving a small opening for turning.

- Turn the purse right side out: Through the opening you left in the lining, gently pull the entire purse right side out. Use a chopstick or pencil to push out the corners and edges, making sure everything is nice and crisp.

- Finish the closure: Depending on the type of closure you’re using (magnetic snap, zipper, etc.), follow the manufacturer’s instructions to attach it to the top edge of your purse.
- Close the opening: Use a slip stitch or topstitch to close the opening in the lining.
- Final touches: Press the seams of your purse with an iron to give it a polished look. You can also add embellishments like buttons, bows, or embroidery to personalize your creation!

And there you have it—a handmade fabric purse ready to carry your essentials in style! Feel free to customize the design with different fabrics, trims, or embellishments to make it uniquely yours.


