If you want to cut and stitch a top in a straightforward and easy way, here’s a step-by-step technique you can follow:
Materials Needed:
- Fabric of your choice
- Fabric scissors
- Measuring tape or ruler
- Fabric chalk or washable marker
- Pins
- Sewing machine or needle and thread
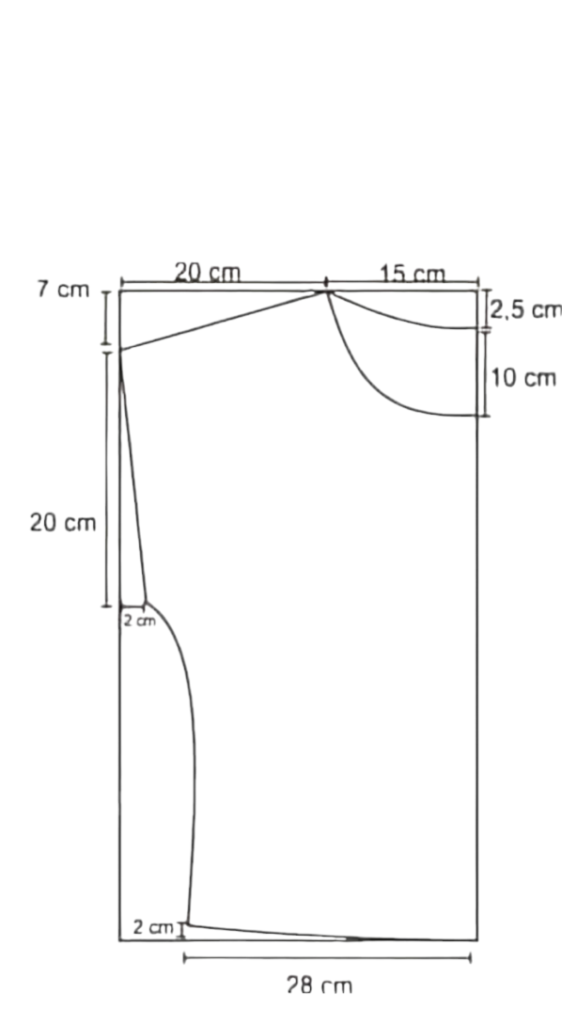
Draw pattern Pattern according to Measurements:
Here’s the measurement list:
Those measurements are marked with cm.
top length: 50cm
Waist: 28cm*4
Shoulder: 30cm
Neck width: 15*2cm
Neck height front:10cm
Neck height back: 2.5 cm
Sleeve width: 20cm
Steps:
- At first, mark for length, and it is 50cm.
- Mark width ,it is 28+ 2 cm, 2 cm for shaping .I take total 30 cm width because, the fabric is 4 fold.
- Mark for shoulder, it is 20cm from neck ending line. I mark 7 cm lower and draw a line with neck ending width, because our shoulder is not a flat surface it has a slope in the ending part.
- From 7cm point to 20cm I mark a point for the sleeve, so I don’t have a hassle for cutting, making and attaching the sleeve.
- From the sleeve edge corner to 2 cm right side, I mark a point.
- from this point to bottom point 28 cm width in waist.
- Mark the outline of your top on the fabric using fabric chalk or a washable marker. Include seam allowances (typically 1/2 inch to 1 inch) around your measurements for sewing.
-
Cutting:
- After finishing all the markings, I take the sharp scissor and cut according to my line. Take your time to ensure the cut is even and follows the marked line accurately. If you’re cutting a straight line, keep the scissors steady and move them smoothly along the fabric.
Sewing:
after cutting, you can sew it by hand or with the help of a machine.
Steps:
- Sew the two shoulder
- Sew both sides according to the line
- Sew the hem of sleeve
- Sew hem of bottom part
- Add an extra fabric part for the sewing neck.
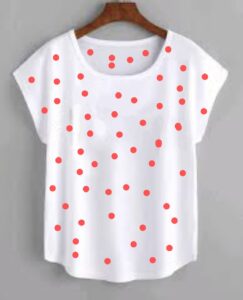
So, you will get a top like this.
Happy stitching.


